Roofing

Roof Repair – What You Need to Know

Unlike replacing an entire roof, roof repair focuses on a smaller section of the structure. This can include patching holes and small gaps or replacing damaged shingles or materials.
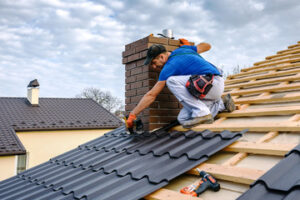
Roof Repair

A thorough inspection is a critical first step. Check with your homeowners insurance as well, they can cover storm damage. Visit Website to learn more.

Your roof is subject to a lot of damage throughout the year. Sudden and severe storms, cool weather, and the natural aging of asphalt materials can all take their toll on your shingles. The result is a leaky roof, sagging shingles, or even missing shingles. Fortunately, the vast majority of shingle damage can be repaired with relative ease. First, assess the damage. If you notice that a single shingle is curling up at the edges, lifting, or has a cracked surface, it’s time to get on your roof and repair the problem before it snowballs into a bigger issue.

If your shingle is simply loose, you can use a tar sealant to temporarily hold it in place for another season or two. But this isn’t a permanent fix and the shingle will likely have to be replaced sooner rather than later.

Using a catspaw pry bar, carefully peel back the layer of shingles directly above the damaged one to break the sealer strip connection and expose the nails holding it in place. Next, use a carpenter’s square to draw a vertical line across the damaged shingle and cut along it with your utility knife. Then, remove the torn section of the shingle and replace it with a fresh new one.

If the shingle is cracked, you can also use a tar sealant to temporarily repair it until you can replace it later. Again, this isn’t a permanent solution and the shingle will probably need to be replaced sooner than you would have preferred.

Replacing a shingle isn’t rocket science, but it requires a good amount of care and attention. Ideally, you should consult with a roofing professional to learn the best ways to identify and repair damaged shingles. If you do opt to go it alone, start by gathering the necessary materials. You’ll need a flat pry bar, a hammer, a utility knife and a few handfuls of 1-1/4-inch roofing nails. Once you’ve got the tools, locate a few replacement shingles that closely match up in color and size with the ones on your roof and head to your local home improvement center to purchase them.

Damaged Flashing

A roof’s flashing is one of the most important components in protecting your home from water damage. The metal strips can be found at all the seams and edges of your roof, especially near chimneys, vents, skylights, and other penetrations. Flashing is used to direct rainwater away from these areas, so any holes or breaks in the flashing could allow moisture into your house.

The most common flashing damage is caused by the freeze-thaw cycle that occurs every winter. When temperatures drop and the water surrounding your flashing freezes, it expands, which can eventually rip through the flashing and expose the interior of your roof to moisture. Eventually, this can lead to severe structural damage and even mold.

Another common cause of flashing damage is corrosion. The constant exposure to weather elements causes the metal flashing to rust, leading to small holes. This can occur over time, or it may happen after a major storm, such as hail or heavy wind.

Luckily, roof flashing is relatively easy to repair. A roofing contractor can remove the damaged shingles, expose the flashing and replace it. They can also apply a sealant to prevent further water leaks and protect the surrounding shingles.

If your flashing is damaged, it’s crucial that you get it repaired right away. Even small leaks can lead to serious damage over time, including rotted framing and sheathing, destroyed insulation, and stained ceilings.

Damaged Substrate

A building’s substrate is the structural component that supports the roofing membrane and other roof components. If the substrate becomes compromised, leaking can occur, and the integrity of the building could be jeopardized. Damaged substrate is often a result of poor installation or water intrusion. A thorough inspection by a roofing contractor can identify and resolve substrate problems before they become major leaks or safety hazards.

Examine the roof for damaged substrate, examining areas like sags in roof edges and flashing around vents. Also check the base of roof vents for leakage. If the substrate is compromised, the roof will need to be replaced.

Blistering of a roofing material occurs when water gets trapped between layers and causes the surface to swell. It’s most common in older shingles, but can occur in roll roofing as well. If the blister contains water, soak it up with a rag and allow it to dry completely before patching the area. If the blister is just a surface discoloration, it may not need to be repaired.

In cases where the damage to the substrate is more severe, it can be patched using a fluid coating. A fluid coating is designed to cling to the surface of the substrate and provide long-term waterproofing, reducing moisture and condensation that can cause other problems on the roof.

If a membrane roof is compromised, it will need to be replaced. Membrane roofs are not typically as flexible as shingle systems, so it’s important to replace them with the same type of membrane used in the original installation. Moisture scans and core cuts should be performed to determine the condition of the substrate and insulation, and they should be repaired as per NRCA guidelines.

If you need to replace the substrate, remove all sagging and delaminated areas of the roofing material. Remove all screws and nails that secure the existing substrate to the joists, then snap a chalk line across rafters on both sides of the damaged section. This will help you locate the center of the joists and ensure the replacement piece is centered on them. Cut a patch of tar paper or rubber roll roofing 12 in (30 cm) wider and longer than the repair area, apply a liberal coat of cement, and set it in place over the mend. Nail it down with galvanized roofing nails, spacing them at 3 in (7.6 cm) intervals.

Missing Shingles

It’s not always easy to spot a missing shingle, especially since many people don’t go up on their roof to survey it regularly. But if you look closely enough, there should be clues: those middle-of-the-night drips or the dark ceiling stain that appears one stormy afternoon.

If you do happen to spot a missing shingle, it’s important to take quick action. Left unattended, it could lead to a leak in your home’s ceiling or walls. The dampness that results can quickly damage insulation, floorboards and even the structure of your house itself.

Before you start replacing the shingles, first check to see how big a hole is. If it’s a small area, you may be able to handle the repair yourself. If it’s a bigger gap, you will need to call in a professional.

You’ll also need to make sure you have a set of replacement shingles on hand, which can be purchased at any home improvement store. Once you have them, you can start by removing the damaged shingle with a pry bar and removing any nails that are still holding it in place. This will ensure that the new shingle doesn’t puncture or damage the existing shingles.

Next, slide the new shingle into place. It’s typically easier to use a single row of shingles rather than trying to replace just one at a time. Using this method will help ensure that the shingles are layered properly, so they won’t come loose over time. Make sure you nail the shingle down through its nail strip and not the adjacent shingle underneath, as this can puncture the new shingle and cause leaks in the future.

While this fix is relatively easy, you should never attempt to work on a roof yourself without proper training and the right safety equipment. A professional roofer can quickly assess and treat any issues with your roof to keep it in good condition. And they can help you identify problems before they cause major problems, so your home can continue to provide a safe, warm and comfortable space for you and your family.
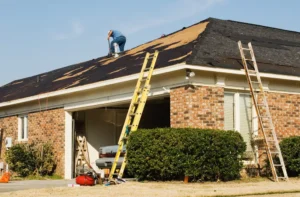
Roofing

Storm Damage Repair

After a severe storm or natural disaster, you should stay indoors until officials say it is safe to go outside. This is particularly important if you live in an area that experiences high winds.

Contact a professional restoration company to inspect the damage and recommend how to proceed. Document the damage and submit it to your insurance provider. For more information visit Website.

Storm damage can often leave behind water damage that is not easily noticed. Several things, including roof damage, broken windows and doors, and flooding, can cause the damage.

Once a home has been affected by flood damage, the repair process must start as quickly as possible. The longer the water is allowed to remain in your home, the more likely it is that it will cause irreparable damage to the structure of your building and the contents of your house.

Depending on the extent of the flood damage, you may need to take some preventive measures to protect your home from further damage. These measures include sealing gaps or cracks in your house and boarding open doors or windows. You should also ensure that any appliances in your home exposed to water are disconnected from their power source and serviced. This will reduce the chances of an electrical fire breaking out and help avoid further water damage to your property.

When a professional arrives to begin the storm damage restoration process, they must inspect the property thoroughly. They will look at all aspects of the building, including the roof. They will then assess whether stop-gap repairs or a full building restoration is required. They will also ensure the building is returned to its original condition and meets all current building codes and fire safety standards.

In addition to assessing the damage caused by the water, a professional will need to determine what is covered under your insurance policy and your deductible amount. It is a good idea to document everything that has been damaged, even the smallest details, in case of any issues with your insurance claim.

Once they have finished the repair process, a professional will clean up any remaining debris and moisture from the property. They will also take steps to remove any items ruined by the water, such as carpets and furniture.

Getting your home back to normal after storm damage is a top priority, especially when sewage lines become backed up. This is a serious health risk due to sewage water bacteria, viruses, and other germs. It can also cause gastrointestinal distress, such as diarrhea, vomiting, and skin irritation.

If you have sewage in your home, the first thing to do is to call for help as soon as possible. Ensure the area is safe before trying to clean it up by shutting off any water valves and staying away from contaminated areas. Use rubber gloves, goggles, and boots to protect yourself from harmful pathogens. Avoid using sinks or toilets, especially close to the backup location.

Sewage can damage building materials, causing severe structural damage. It can also pollute ponds, lakes, and streams used for drinking water. Sewage backups can also be a major financial disaster for homeowners and businesses. They can cause hefty repair costs and loss of revenue, as well as potential lawsuits from customers and employees.

Flooding from sewage differs from other types of water damage, as it is very dangerous and requires professional assistance. If sewage is flooding your property, call for help immediately and stay away from the area until professionals arrive.

You can prevent sewage flooding by installing a backflow prevention valve on your main sewer line. Maintaining your plumbing system by regularly cleaning drain traps and keeping tree roots out of the sewer lines is also important.

You should call your insurance company immediately after a major storm, even if you’re not ready to file an official claim. This will allow the company to send an adjuster to inspect the property and provide a claim estimate. Be sure to provide detailed documentation of the damaged property, including photos, written descriptions, and itemized values. The insurance company will prioritize claims with the most severe damage, so document everything. The experts at STOP Restoration can coordinate with your insurance company to help you get the claim process started.

Mold is a natural bio-hazard that can quickly grow in your home after a hurricane or flood damage. Molds thrive in moist conditions and need food sources like organic materials or cellulose to produce. Mold can also grow behind walls, attics, crawl spaces, and basements. If not remediated, mold can lead to structural and health problems. Mold growth is a serious problem and requires remediation before returning to your home after storm damage.

In addition to sagging ceilings and walls, signs of mold damage include discolored wall or ceiling surfaces and a musty or mildew odor. If you suspect your home is affected, call a restoration company immediately to schedule an environmental inspection and testing. An ecological inspector should be licensed and accredited by the National Environmental Health Association, the American Industrial Hygiene Association, or the Institute of Inspection Cleaning and Restoration Certification. Avoid contractors who inspect and repair, as this is a conflict of interest.

Once the inspector has completed a thorough walk-through of your property, they should provide you with a detailed report and images. They can then work with your insurance carrier to approve a restoration bid so you can begin repairing your home.

Until your house is professionally inspected and restored, staying in a hotel or finding another temporary living arrangement is best. Returning to your home after it has been flooded is dangerous, and mold and other contaminants can spread throughout your residence by airborne spores.

If you return home, keep children and pets away from the affected areas until properly cleaned and sanitized. You should also wear personal protective equipment, including clean clothing and masks, to prevent the transfer of mold spores to your family or yourself.

After a disaster, it’s important to work with a licensed and certified restoration company with experience handling hurricane and flood damage and mold damage repair. The team at Midwest Comfort Homes has extensive experience and will work with your insurance company to get your restoration bid approved quickly so you can return to your home as soon as possible.

During a severe storm, strong winds can cause structural damage to your home and belongings. They can also transport debris, causing additional damage. Debris can include pieces of destroyed buildings, sand, gravel, tree limbs, commercial property, and even your personal belongings. Debris damage repair is a major part of storm restoration.

After a storm, you must look for any damage you can fix and ensure your insurance company knows the situation. This will help ensure a smooth, hassle-free claims process. Start with a thorough inspection of your property and take pictures of any damage that can be seen. Then, look at your homeowner’s policy to understand what you need to do to file a claim.

If you have pictures of your home before the storm, your insurance company can quickly and easily compare them to see what has changed in your house. This will prevent them from accusing you of making false or fraudulent claims and speed up the process of getting compensation for your damaged items.

During the storm, your roof could sustain wind damage through ripped or missing shingles. This is a common storm damage that can occur during any weather event. However, there are some steps you can take to protect your roof from further damage.

In addition to inspecting your roof, you should look at your windows and doors for cracks, holes, broken panes, and damaged frames. You should also check the sidings, paint, bricks, and outdoor appliances like air conditioning units for dents, cracks, splitting, holes, chipping, and discoloration. Ensure that you do this as safely as possible.

Once you have taken photos of the storm damage, call your insurance agent and ask to schedule an inspection. Ensure you are present for the check and show your insurance agent the pictures of the storm damage. This will ensure that your insurance company will reimburse you fairly for the repairs. Also, keep all receipts for materials used in the repairs so that your insurance company knows the repairs are fair and reasonable.